
Whether you’re planning on hiking in Nepal with a guide or trekking the Khumbu region independently, this Everest Base Camp trek itinerary should give you a clear idea about what to expect.
Everest Base Camp has been on my bucket list for 15 years, ever since I learned about the Himlayas at school.
But I never had a chance to do it until Spring 2024, when my partner’s friends organised a group of us to undertake the hike.
When I was preparing for the hike, I was full of questions. How much money do I need? Is it safe? How should I train?
But, above all, what is the standard Everest Base Camp trek itinerary?
We were provided an itinerary for the trail, but I was craving more details.
So, when I was doing the trek, I decided to put together our detailed Everest Base Camp itinerary to help any future hikers!
This is the standard itinerary that’s followed by most tour groups, with a few variations, and my experience and thoughts about it. If you’re hiking independently I have put a few suggested tweaks in that I think could improve the itinerary.
Let’s get into it!
Everest Base Camp trek itinerary
The typical Everest Base Camp itinerary is as follows:
- Day 1: Flight from Kathmandu to Lukla; trek to Phakding
- Day 2: Phakding to Namche Bazar
- Day 3: Acclimatization day in Namche Bazar
- Day 4: Namche Bazar to Tengbouche
- Day 5: Tengbouche to Dingboche
- Day 6: Acclimatization day in Dingboche
- Day 7: Dingboche to Lobuche
- Day 8: Lobuche to Gorak Shep; visit Everest Base Camp
- Day 9: Hike to Kala Patthar; return to Gorak Shep; trek down to Pangboche
- Day 10: Pangboche to Namche Bazar
- Day 11: Namche Bazar to Lukla
- Day 12: Flight from Lukla back to Kathmandu
This is the itinerary that most tour companies use, give or take a few stops (for example, some groups hike to Manjo rather than Phakding on the first day, or stay in Periche rather than Pangboche on day 9).
And of course, if you’re trekking independently, yours might look a bit different.
Here’s what to expect on each day!
Day one – Fly to Lukla – hike to Phakding

- Start Elevation: Lukla – 2,860 meters (9,383 feet)
- End Elevation: Phakding – 2,610 meters (8,563 feet)
- Elevation Loss: 250 meters (820 feet)
- Distance: Approximately 8 km (5 miles)
- Difficulty: Easy
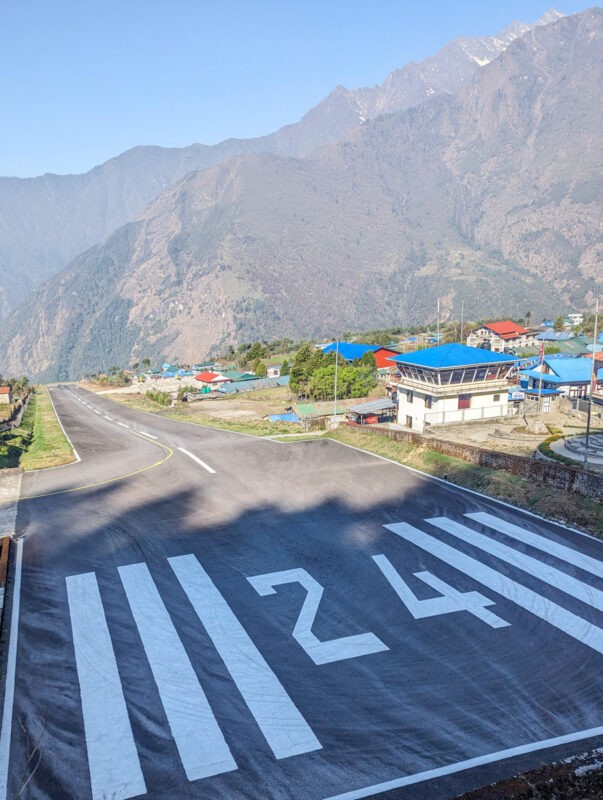
Your Everest Base Camp hike begins by flying to Lukla airport – often dubbed the “world’s most dangerous airport” (you can see my thoughts on it here).
The timing of your flight can vary greatly – it depends on the weather, which is incredibly temperamental at Lukla (as expected at 2,800 metres altitude) and how many passengers. Flights might depart as early as 6 AM or as late as mid-afternoon.
Keep in mind, there’s a 50% chance flights could be cancelled due to weather. If this happens, you might need to wait for the next available flight (which could be the next day) or opt for a helicopter ride at an additional cost (we were told that this would be $400 per person, although I have heard of people paying much cheaper).
Upon arrival in Lukla – elevation 2,860 meters – you’ll feel the anticipation buzzing through the crisp mountain air.
Compared to other villages along the trail, Lukla is positively cosmopolitan, with a variety of shops and tea houses.
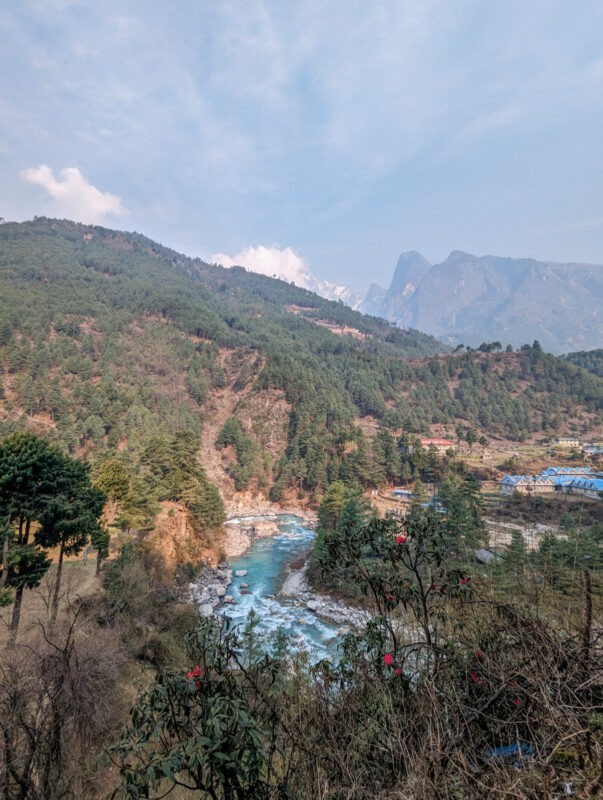
The trek to Phakding is a gentle introduction to the Himalayan terrain.
It’s mostly downhill (although there are some ups, too – this is Nepali Flat) and takes about 3 to 4 hours, covering around 8 kilometres. As you descend to Phakding (2,610 metres), you’ll pass through beautiful landscapes dotted with traditional Sherpa villages and monasteries and walk along the Dudh Koshi River.
The path is well-maintained, with plenty of spots to rest, grab a snack or use the toilet. While the altitude here is significant, it’s generally not high enough to trigger acute mountain sickness, though some of us started feeling the elevation!
Some hikers continue to Monjo, but whether you’ll be able to do this depends on what time your plane lands. I wouldn’t recommend counting on being able to hike past Phakding.
My Suggestions
For a less tiring start to this journey, I’d advise spending the night in Ramechhap or flying to Lukla a day early.
Staying in Kathmandu requires waking up around 2am for the drive to Ramechhap, which can be exhausting even before your trek begins!
Many tour companies offer accommodation arrangements in these locations – if you’re on a private tour, just ask your organiser before heading out.
Where to stay
We stayed in Trekkers Lodge Phakding, which was cosy and well-appointed – I loved the outdoor sitting area with views of the hills! Rooms were en-suite, with a shower – although the water was freezing cold.
Day Two – Phakding to Namche Bazar
- Start Elevation: Phakding – 2,610 meters (8,563 feet)
- End Elevation: Namche Bazar – 3,440 meters (11,286 feet)
- Elevation Gain: 830 meters (2,723 feet)
- Distance: Approximately 10-12 km (6-7.5 miles)
- Difficulty: Moderate
Today is your first full day on the trail!
Today’s trek from Phakding to Namche Bazar is where the real climbing begins.
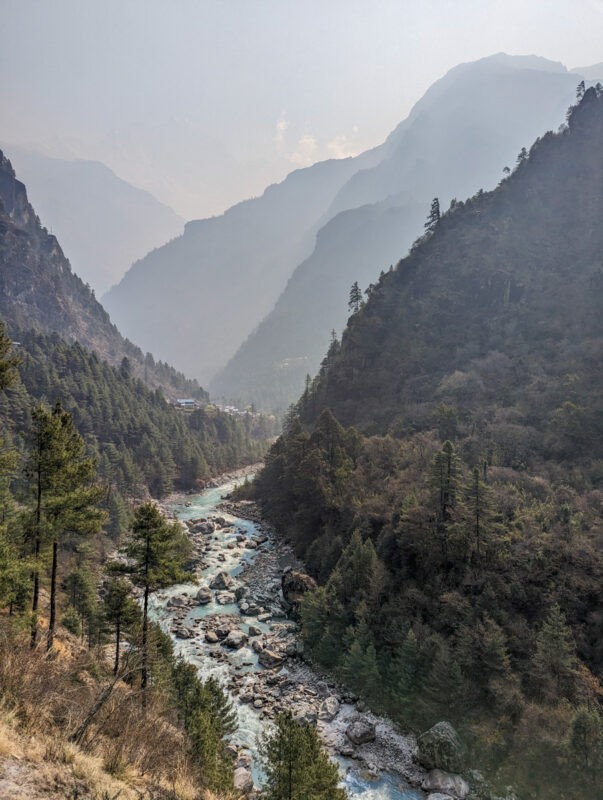
The hike starts with a pleasant walk along the Dudh Koshi River, but don’t be fooled by the easy path – it will get more difficult! You’ll cover approximately 10 to 12 kilometres today, which usually takes about 5 to 7 hours without breaks, depending on your pace.
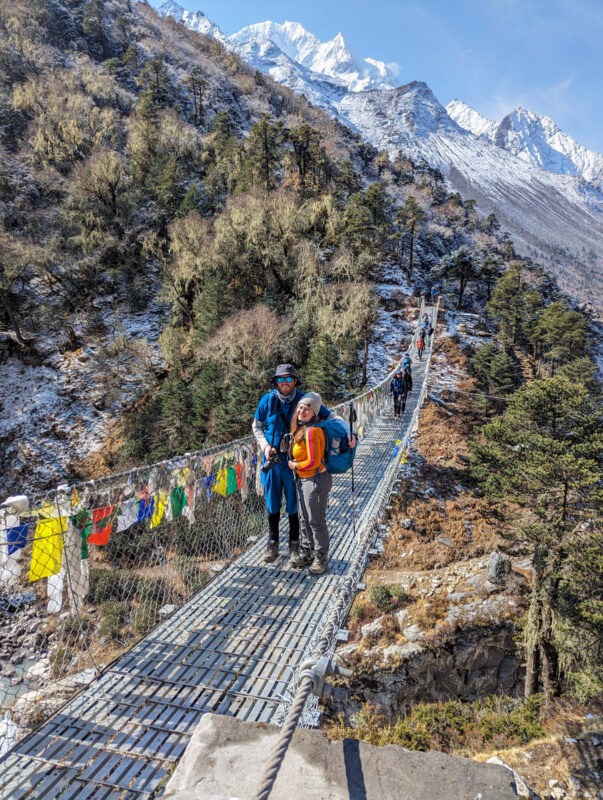
As you leave Phakding, the trail meanders through magnificent pine forests, crossing and recrossing the river several times on suspension bridges draped with prayer flags that flutter in the wind. I found these bridges to be rather hair-raising, but they are stable!
The most famous is the Hillary Suspension Bridge, named after the first Westerner to summit Everest (along with Sherpa Tenzing Norgay).
Elevation gain is a key part of today’s hike, as you ascend from Phakding at 2,610 meters to Namche Bazar at 3,440 meters – this is quite a lot of altitude to gain at once, but unfortunately, there’s not really anywhere else you can stop (as you’ll gain most of this elevation on the steep climb up to Namche!).
As you approach the village, you might start feeling the altitude – I found the last ascent into Namche particularly challenging.
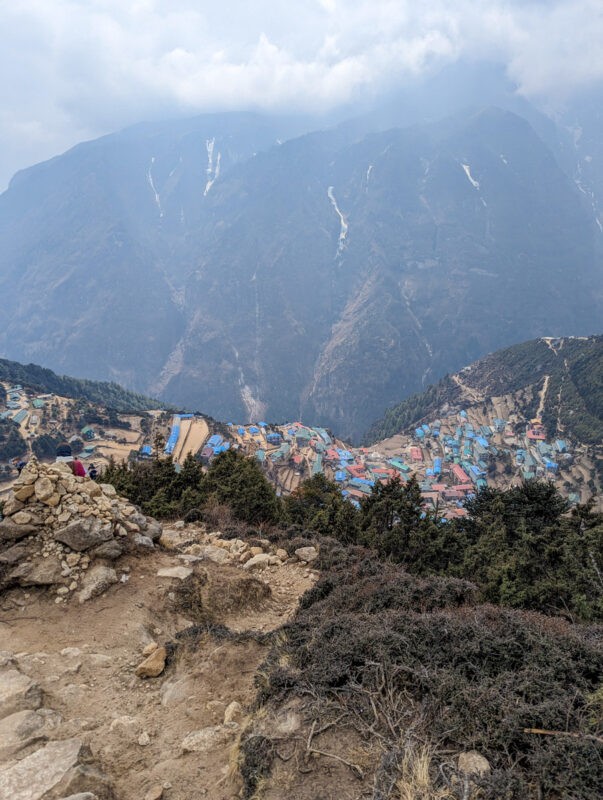
Namche Bazar, often considered the gateway to the high Himalayas and the largest town in the Everest region, is a bustling sherpa community that offers a warm welcome to trekkers. Here, you’ll find an array of cafes, bakeries shops and the world’s highest Irish pub!
It’s a cultural hub where trekkers can soak up the local culture and prepare for higher altitudes in the days to come.
Where to stay
Hotel 8848 was a fun tea house with a great atmosphere. I’d definitely recommend staying here, and try the veggie burger in the restaurant – it’s excellent!
Day Three – Acclimatization in Namche Bazar
- Activities: Hiking uphill and then down for acclimatisation
- Difficulty: Easy to moderate
Take today to acclimatise and explore the heart of the Khumbu region, Namche Bazar.
Your body will thank you for allowing it time to adjust to the higher altitude!
All organised treks will include a day of acclimatisation in Namche, and I’d highly recommend doing the same if you’re hiking independently.
However, acclimatisation doesn’t mean resting all day! In fact, the best way to acclimatise is to keep active.
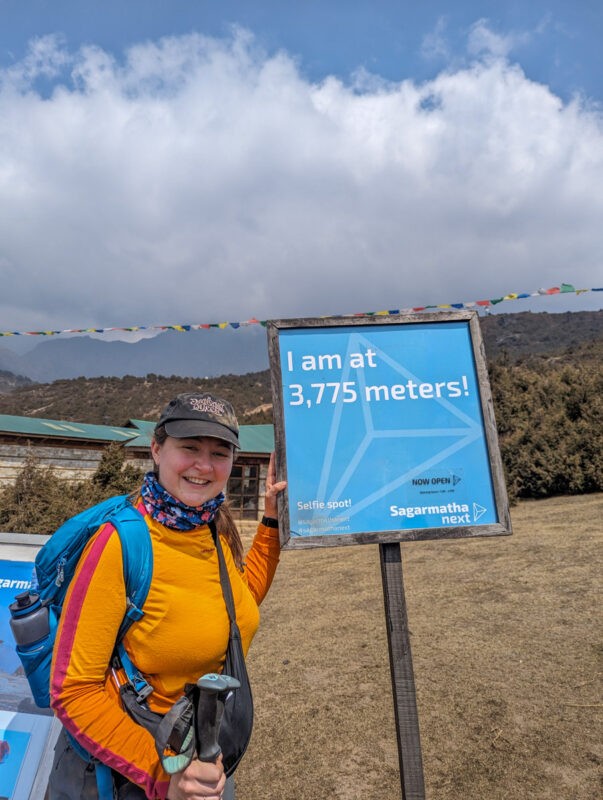
Start your morning with a short hike up about 150 meters to the Sagarmatha National Park Museum.
As it’s just above Namche, this climb not only helps with acclimatisation but you can also catch a glimpse of Mount Everest on a clear day!
The museum itself is well worth a visit – here, you’ll discover insights into Sherpa people, the history of Everest expeditions and its geography.
After your museum visit, continue your hike up to the Everest View Hotel.
Aim to reach early; the views are best in the morning, as afternoons are often cloudy!
The hotel is apparently the highest luxury hotel in the world and we visited for a cup of tea. It was surprisingly the most underwhelming—and the priciest—tea I had, served DIY style with just a pot of hot water and the raw ingredients.
Also, note trekkers are expected to use the external bathrooms, so keep some toilet paper handy!
If I did the trek again and it was unlikely that I’d see Everest from the hotel, I’d probably stop a bit before it and return to Namche. The last part of the trail is flat, so you could just hike to 4800 metres and then descend rather than pay for the Khumbu region’s most expensive tea at the hotel!
After lunching at our tea house, we had the afternoon at leisure. Our tea house (Hotel 8848) had hot showers which was bliss, and I did a bit of last-minute shopping!
Day Four – Namche Bazar to Tengboche
- Start Elevation: Namche Bazar – 3,440 meters (11,286 feet)
- End Elevation: Tengboche – 3,860 meters (12,664 feet)
- Elevation Gain: 420 meters (1,378 feet)
- Distance: Approximately 9-10 km (5.6-6.2 miles)
- Difficulty: Moderate
First up on day four is a climb out of Namche Bazar, heading up to a path that runs above the town. Then, it’s generally flat for a while, with a few minor uphills and downhills.
While this is fairly easy, it was here that I started feeling awful – low energy, headachey and a bit sick.
At our tea stop, I started taking Diamox as I thought it might be due to altitude sickness.
We lunched just before the infamous uphill zig-zag path that leads to Tengboche monastery.
This path is steep and relentless – it took us about two hours to reach the top (elevation: 3,800 metres).
Here, the air is noticeably thinner. Dominating the landscape is the majestic Tengboche Monastery.
It’s well worth popping into – with an entry fee of just 300 rupees, it offers not only a moment of spiritual reflection but also a chance to admire its intricate artistry up close. When we visited, we even got a blessing from one of the resident monks!
Inside, the air is heavy with the scent of incense; the walls, stories high, are adorned with ancient thangkas.
However, by the time we reached the top of the zig-zags, we didn’t have the energy for a monastery visit – instead, we popped in on the way back down.
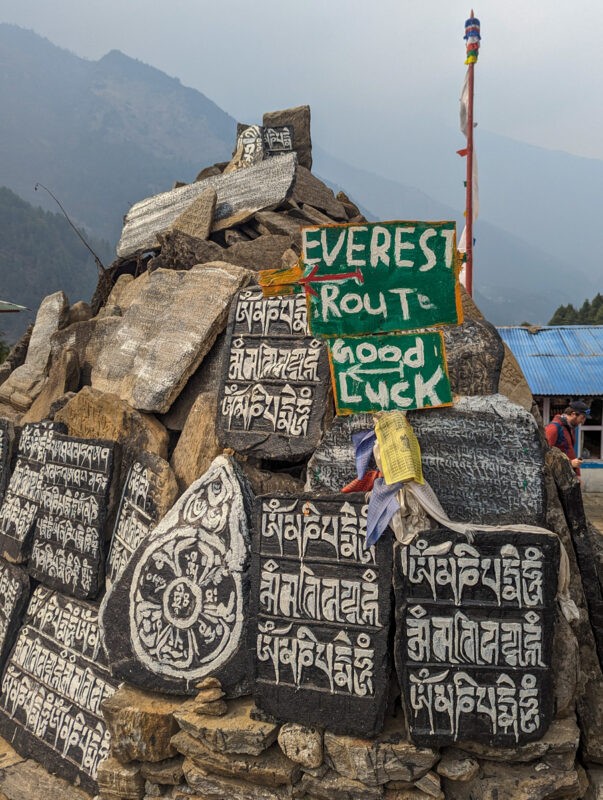
From Tengbouche Monastery, it was a 45 minute walk to Good Luck Tea House, where we were staying for the night.
Despite the name, this was not a lucky night for me. My nausea had worsened and I retreated straight up to our room, where I was quickly quite sick! (Luckily, we had an en-suite bathroom, unluckily, the walls were paper-thin).
I wasn’t sure if this was altitude or food-related, but I thankfully did start feeling a lot better after I was sick. My guide was an angel and brought me dinner and reassured me that I was ok for the moment, and could see how I felt in the morning regarding altitude.
I had one episode of diarrhoea in the night, but thankfully woke up in the morning feeling fragile, but lots better and able to continue the hike.
Where to stay
Good Luck Tea House was decent, although my memory of being there is marred by feeling awful!
Day Five – Tengbouche to Dingboche
- Start Elevation: Tengbouche – 3,800 meters (12,467 feet)
- End Elevation: Dingboche – 4,410 meters (14,470 feet)
- Elevation Gain: 610 meters (2,000 feet)
- Distance: Approximately 11 km (6.8 miles)
- Difficulty: Moderate
The trek was starting to get harder due to the altitude, but other than that, this hike is a lot more manageable than previous days.
However, as I was still quite fragile, I struggled with the first part of it!
We weaved out of Tengbouche and through the last of the trees – after our lunch stop, we’d be hiking above the tree line.
As the trail ascends toward Dingboche, the increase in altitude becomes more apparent, and the air noticeably thinner.
However, the ascents are nowhere near as severe as the previous days.
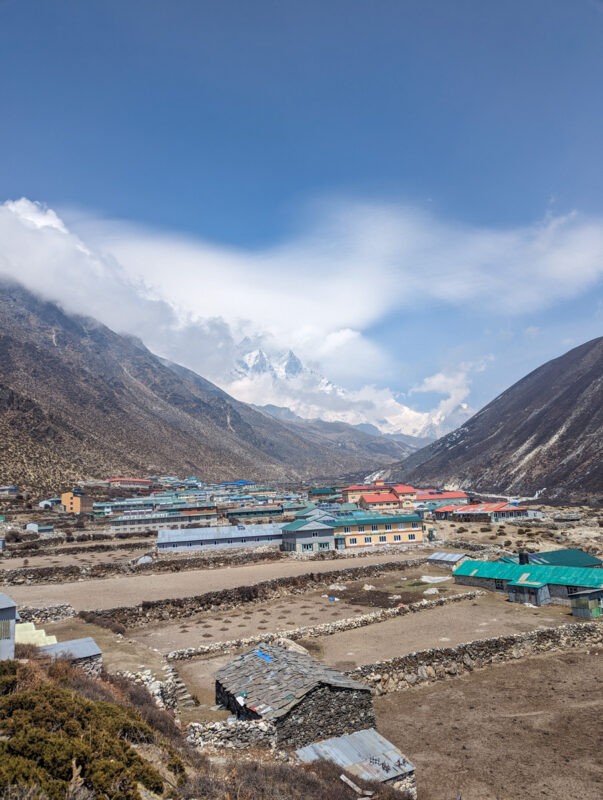
Dingboche, sitting at an altitude of 4,410 meters is a critical acclimatisation stop. It’s very important to take a day to acclimatise here!
Where to stay
We stayed at Good Luck Tea House again – it’s a branch of the same tea house in Tengboche – and had a couple of hours in the afternoon to relax before dinner. I couldn’t face much food – I was scared of being sick again – so I just had a bowl of plain pasta with salt and pepper.
Day Six: Acclimatization Day in Dingboche
- Elevation: Dingboche – 4,410 meters (14,470 feet)
- Activities: Short acclimatization hike
- Total Hiking Time: Approximately 2 hours
- Elevation Gain: 300 meters
- Difficulty: Easy
Day six on the Everest Base Camp trek is a key acclimatization stop in Dingboche. There are a variety of hikes to do around the village – we opted for a fairly easy but still hilly trek. You can do longer, but for our group, this worked well to acclimatise while still having ample time to rest.
Above Dingboche, there are three flagpoles, the highest of which is 300 meters above the town. We opted to hike to the highest one.
This hike is easier and shorter than the previous acclimatisation day in Namche Bazar, taking about 2 hours in total.
I was feeling much better today, so felt quite invigorated as we hiked around!

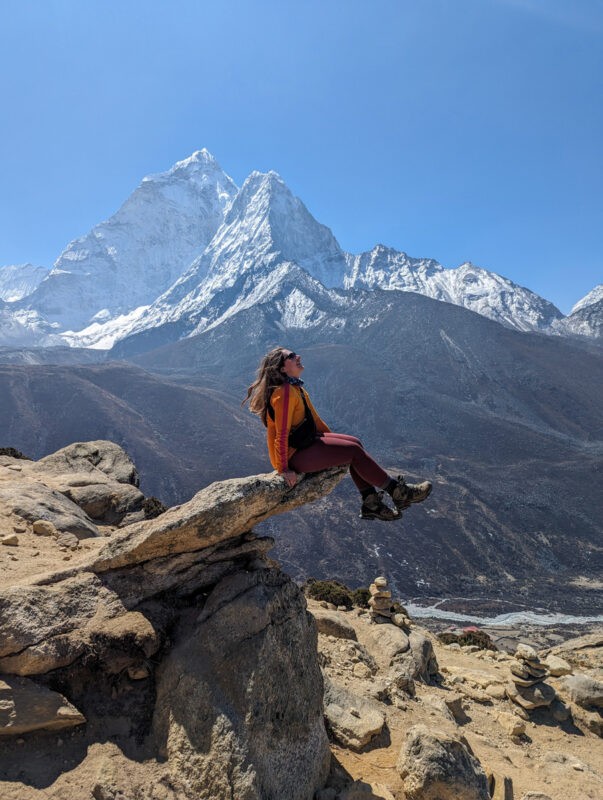
There are lots of photo stops on the way too – the mountain views are stunning – including the famous rock that everyone gets a photo at. Climbing on it isn’t as scary as it looks!
After returning to Dingboche, you have the rest of the day to relax!
We decided to visit Cafe 4410, a popular bakery serving hot drinks, cakes and heavier meals. Try one of their luxury hot chocolates!
We actually ended up in the cafe for hours – the waiter put on the Everest movie, so we watched that and enjoyed being stationary for a bit!
Day Seven: Dingboche to Lobuche

- Start Elevation: Dingboche – 4,410 meters (14,470 feet)
- End Elevation: Lobuche – 4,900 meters (16,076 feet)
- Elevation Gain: 490 meters (1,608 feet)
- Distance: Approximately 7-8 km (4.3-5 miles)
- Difficulty: Moderate to Challenging
You’re going to hike to nearly 5,000 metres today, so buckle up!
Leaving Dingboche behind, you’ll feel like you’re saying farewell to the vestiges of normality as the landscape transitions into more stark, alpine scenery.
Today’s route progresses from 4,410 meters in Dingboche to 4,900 meters in Lobuche, navigating through changing terrains and increasing altitudes.
The trek starts gently – it’s more or less flat as it exits Dingboche.
Then, it follows up the valley, gradually gaining elevation slowly.
We stopped for lunch in Thukla at the Yak Lodge. I’d recommend having the ramen noodles here (simple, but gives you hydration and energy) and avoiding the fried noodles – I had them on the way down and they were awful.
After Thukla, it’s time to climb up the cliff face! This looks short, but the altitude and steepness mean it’ll take around an hour.
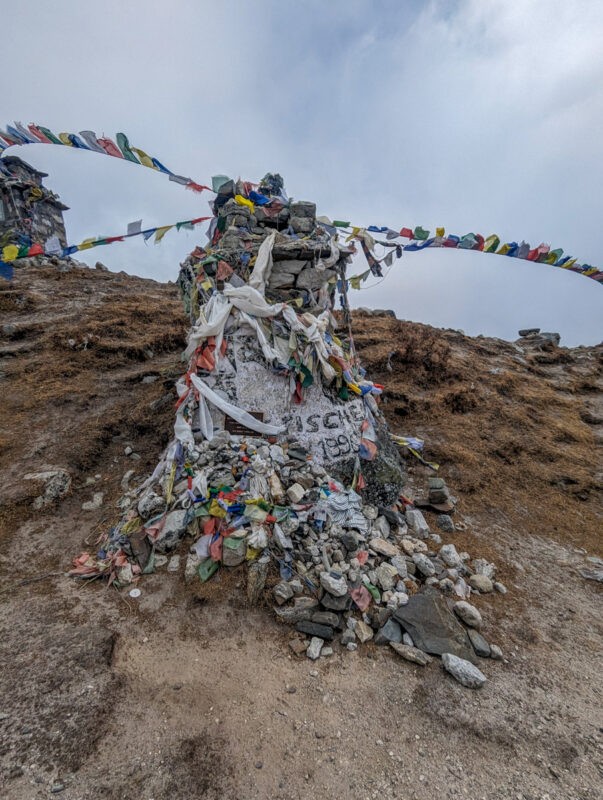
At the top of the climb, you’ll find a memorial site which honours climbers who have lost their lives trying to summit Everest.
It was especially poignant for us, as we’d just watched the Everest movie the day before, which focuses on the 1996 disaster.
We saw memorials to Rob Hall and Scott Fisher, who were two of the victims. It’s a harrowing reminder of how dangerous the mountains can be, but don’t worry – the dangers lie after base camp, not before it (take a look at my article about Everest Base Camp safety for more information).
After passing the smaller Lobuche Base Camp, the trek continues for another 90 minutes to reach the village of Lobuche.
While the hike is not technically difficult aside from the uphill section, the increasing altitude makes the physical exertion feel more intense, and symptoms of altitude sickness may start to become more noticeable!
Lobuche is known for housing the world’s highest bakery; it’s not as well stocked as Dingboche, but I was surprised to see it at all!
Where to stay
I can’t recommend our tea house in Loboche (Mother Earth)
It was notably less comfortable compared to previous nights, with no lights in the bedrooms and substandard toilet facilities. It also backed onto the stables, so we could smell animals from the corridor!
This is partially due to it being such high altitude but our tea house in Gorak Shep, 300 metres higher, was a lot better!
Day Eight – Loboche – Everest Base Camp – Gorak Shep
- Start Elevation: Lobuche – 4,900 meters (16,076 feet)
- End Elevation at EBC: Everest Base Camp – 5,364 meters (17,598 feet)
- End Elevation at Gorak Shep: Gorak Shep – 5,164 meters (16,942 feet)
- Elevation Gain: 464 meters (1,522 feet) to EBC
- Distance: Approximately 15 km (9.3 miles) total
- Difficulty: Challenging
Today’s the day!
We finally reached the base of the highest mountain in the world.
The morning journey from Lobuche to Gorak Shep had relatively gentle uphills, but at altitudes surpassing 5,000 meters, the air is notably thinner—oxygen levels hover around 55% of what they are at sea level.
This significant reduction in oxygen can make even slight inclines feel disproportionately challenging!
This was also the only area around Everest Base Camp where I felt like it was too busy. The pathway is narrow here, and lots of hikers were on their way to base camp, so it was quite chaotic at times!
You will catch your first view of Everest Base Camp (and the Khumbu icefall) here.
In Gorak Shep, a small settlement at 5,200 meters, we stopped for lunch and a brief rest. As I mentioned, the tea house here was much better than Loboche!
Then, it was time for the final leg to Everest Base Camp!
The trail followed the same pattern as the morning – a net incline of 164 metres, but a lot of downhill and uphill along the route.
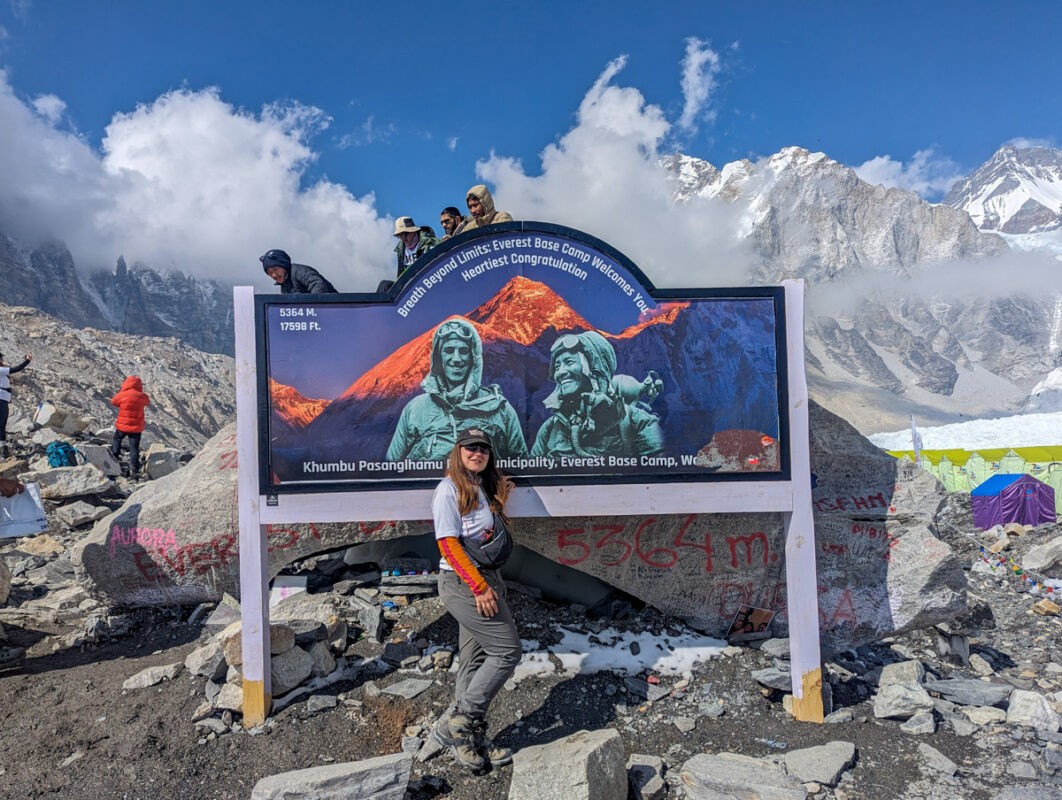
After around 2.5 hours, we made it! Everest Base Camp is 5,364 metres high, and it’s where summiteers stay for around two months while preparing to hike to the summit of Mount Everest, the highest point in the world.
As a tourist, access is restricted to the periphery of the actual campsite, but even from the edges, the sense of adventure and the scale of the expeditions are palpable.
You can catch a view of Everest from the base camp, and of course take photos with the signature rock. Although, since 2024, there’s been a sign over part of it, so photos are more limited these days!
Where to stay
We stayed at Buddha Lodge, which, while basic, was remarkably better than Mother Earth in Loboche. For such high altitude, I was impressed with their food offerings. Try the hash brown!
Day Nine: Gorak Shep – Kala Patthar – Pangboche
- Start Elevation: Gorak Shep – 5,164 meters (16,942 feet)
- Highest Point: Kala Patthar – 5,545 meters (18,192 feet) – this is the highest altitude that you’ll go on the trek
- End Elevation: Pangboche – 3,985 meters (13,074 feet)
- Distance: Approximately 15-16 km (9-10 miles)
- Difficulty: Challenging due to altitude and initial ascent, then easier descent
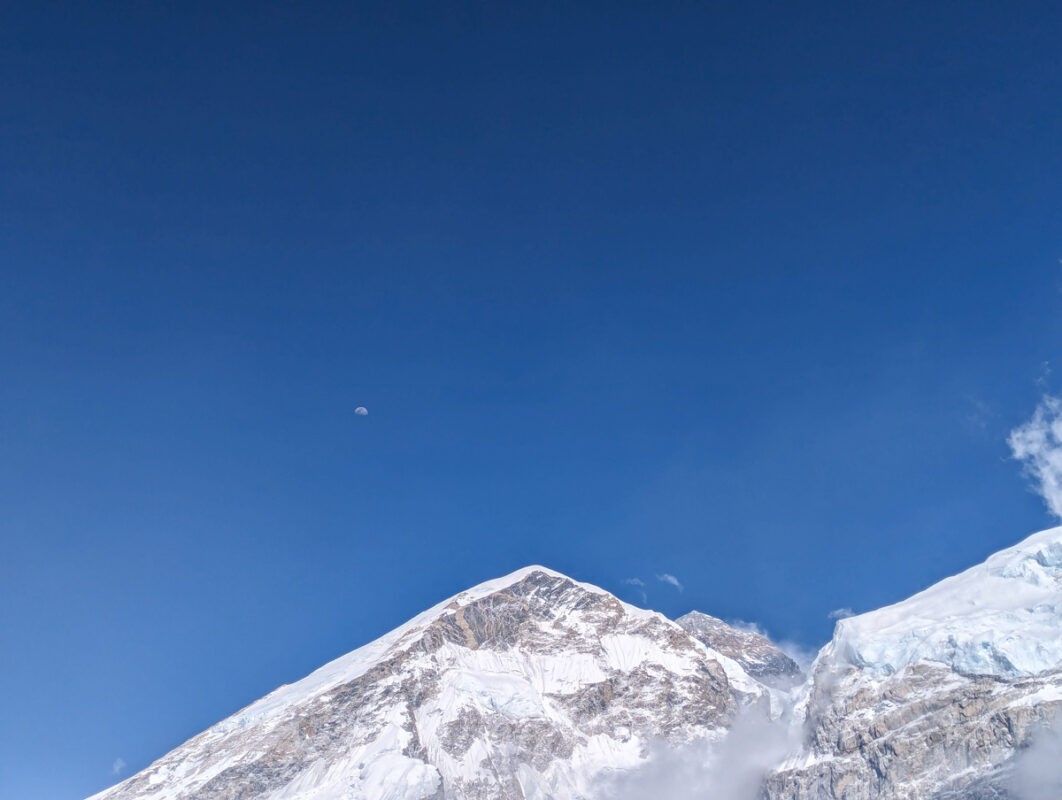
The best view of Everest isn’t actually from Everest Base Camp!
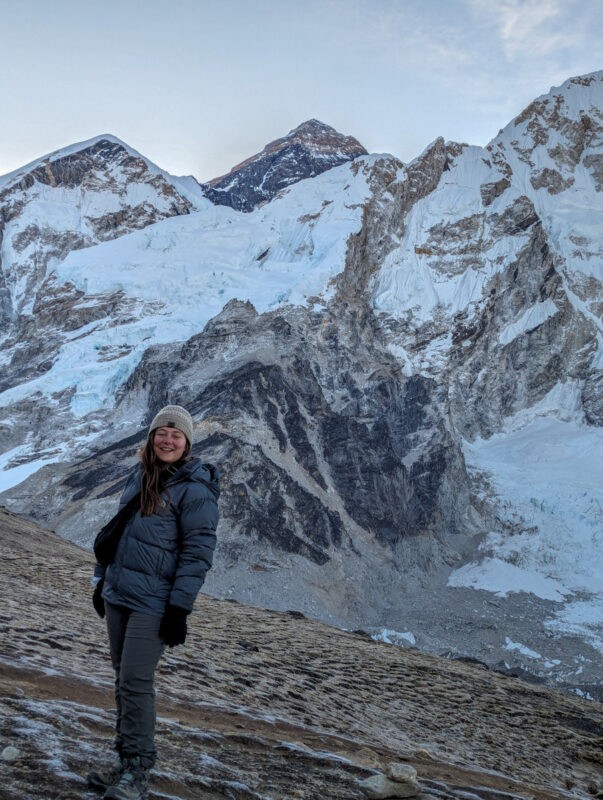
If you can handle even higher elevations, I’d recommend a pre-dawn hike from Gorak Shep to Kala Patthar.
This is just a steep climb from Gorak Shep, and while the full ascent to Kala Patthar’s peak is popular, a partial hike still offers incredible views of Everest and the surrounding peaks, some of which mark the border between Nepal and Tibet.
Not many of us in our group opted to do this trek, but I’d highly recommend it if you can get out of bed (we left at 5am). I found standing underneath the world’s highest mountains as the sun came up to be absolutely enchanting.
The trail then leads down! We retraced our steps, back to Loboche and then further downhill. The first hour was still up and down, which was tough, but then it swiftly got easier.
We were originally aiming for Periche on this day, which sits just below Dingboche, but ultimately decided to descend further to Pangboche, as we had daylight and knew that we’d feel better the further we descended.
The trail was mostly downhill, and was very easy for the most part.
Where to stay
We stayed at Buddha Lodge and Restaurant, which was quite cosy – we were the only people there!
Day Ten: Pangboche – Namche Bazar

- Start Elevation: Pangboche – 3,985 meters (13,074 feet)
- End Elevation: Namche Bazar – 3,440 meters (11,286 feet)
- Distance: Approximately 14-15 km (8.7-9.3 miles)
- Difficulty: Moderate
Continuing the descent, the path from Pangboche to Namche Bazar winds through beautiful Himalayan forests (the trees are back!) and traditional Sherpa villages.
Don’t forget to visit Tengboche Monastery on the way back if you didn’t while ascending.
The trek is mostly downhill, although just as the trail was up and down on the way up, it’s down and up on the way back! There is a particularly hilly section midway through the day.
Once you arrive in Namche, you’ll feel like you’re in the land of mod cons!
We had our first shower in a week and then went to the Irish pub for an alcoholic drink. The Irish pub also serves excellent pizza, easily the best thing I ate all week!
We stayed at Hotel 8848 again.
Day Eleven: Namche Bazar to Lukla
- Start Elevation: Namche Bazar – 3,440 meters (11,286 feet)
- End Elevation: Lukla – 2,860 meters (9,383 feet)
- Distance: Approximately 18-19 km (11-12 miles)
- Difficulty: Challenging due to the afternoon uphill section
It’s the final day of trekking!
The first descent is easy (I do recommend hiking poles, they’ll make this part of the trek much easier), but once we were down in the valley, we then had to climb uphill.
It wasn’t as hard as climbing at high altitudes, but on the last day of the trek, the very last thing I wanted to do was go uphill some more!
However, Lukla is a welcome respite from the trekking; here, you can purchase Everest souvenirs (although you can also get these in Kathmandu) and relax at one of the tea houses. We stayed at The Nest.
Where to stay
We stayed at The Nest, which is where we had lunch on the first day. We had en-suite bathrooms with showers, which could be made hot (for free!) but the beds were incredibly hard here. But, it was our last day in tea houses before we flew back to Kathmandu!
Day Eleven: Flight back to Ramechhap
Another 18 minute flight beckons on this day, but while it’s a very short time in the air, you could end up waiting a while for it!
For us, it wasn’t too bad. We stayed at The Nest (which is right by the airport) until it was time to check in, and then had around a 45 minute wait in the airport before we boarded.
Then, our van was waiting for us to take us back to Kathmandu!
If you have an international flight out of Nepal, I’d recommend leaving a couple of days before it, just in case the weather doesn’t play ball and you end up stuck in Lukla!
How many days do I need for the Everest Base Camp trek?
Most Everest Base Camp itineraries are 12 days long (not including days in Kathmandu). This is because most tourists only have two weeks off work, and it lets them fit it into their holiday time.
It’s possible to do it quicker, but I wouldn’t recommend it unless you have experience at similar altitudes. Acclimatisation is all-important on this hike! If you really need a day less, you could fit the descent into two days rather than three.
Plus, if you’re hiking independently and are able to, I’d recommend taking longer on the hike. Allowing an extra day for acclimatisation in Namche Bazar and stopping more on the way from Namche to base camp could help you avoid feeling unwell.
Having extra days to play with also helps in case of bad weather and flight cancellations.
When is the best time to hike to Everest Base Camp?

The best times to hike Everest Base Camp are during the pre-monsoon spring months of March, April and May, and the post-monsoon autumn months of October and November.
Spring (March, April and May):
Spring is a popular time as the weather is generally stable and relatively warm. Of course, it’ll be much colder in March than May!
Additionally, as it’s pre-monsoon, the likelihood of rain is lower so typically the trails are dry and safer for trekking.
It’s also when most summit attempts leave from Base Camp, so you’ll see most of the activity at the actual camp at this time (usually from mid-April through May). At other times of year (including March), base camp will be a lot quieter.
Autumn (October and November):
The Autumn season is another prime trekking time, with clear skies and temperate weather.
The air after the monsoon is fresh and clear, offering some of the best views of Everest and the surrounding Himalayas.
Plus, the trails aren’t as crowded as they are in the spring months – but you won’t see anywhere near the amount of activity at base camp.
Off-Peak Seasons
Trekking is possible year-round, but most hikers don’t attempt it in the monsoon season (June to early September) or winter.
In the monsoon season, trails can be slippery, mountain views obscured and there’s a much higher chance of landslides.
In the winter season, temperatures are freezing, with lots of snow and the chance of some passes being closed.
Do you need a guide to hike Everest Base Camp?

In the Everest region, unlike other areas in Nepal, hiring a guide is not mandatory. However, I couldn’t imagine doing the hike without a guide.
Our guide helped us manage health concerns like altitude sickness, trekking permits, ensured safe navigation on the trail (ours helped us deal with the many oxen that we had to share the trail with!), facilitated interactions with local communities, and handled logistics such as accommodations and flights.
Their knowledge and skills in addressing sudden medical issues or route changes are invaluable. Plus, hiring guides (and porters!) helps the local economy.
I’d also recommend hiring a porter for this reason; while it feels lazy not carrying your gear, porters are accustomed to the altitude and carrying heavy loads (although not too heavy! Ours could carry a maximum of 30kg, split between two people). Hiring them gives them work, which isn’t always easy to find in the remote Himalayas.
Are you ready to hike Everest Base Camp?
There’s no experience in the world quite like hiking to Everest Base Camp, seeing the world’s highest mountains and fathoming what an undertaking summitting Everest is. While it was tough, I’d recommend it to anyone who feels able to. You’ll quite literally feel like you’re on top of the world!
I have lots of blog posts and YouTube videos to come, and I’ve already been posting on TikTok and Instagram, so hopefully I’ll be covering all bases regarding the EBC trek. If you have any questions, feel free to reach out on social media and I’ll try my best to answer you!